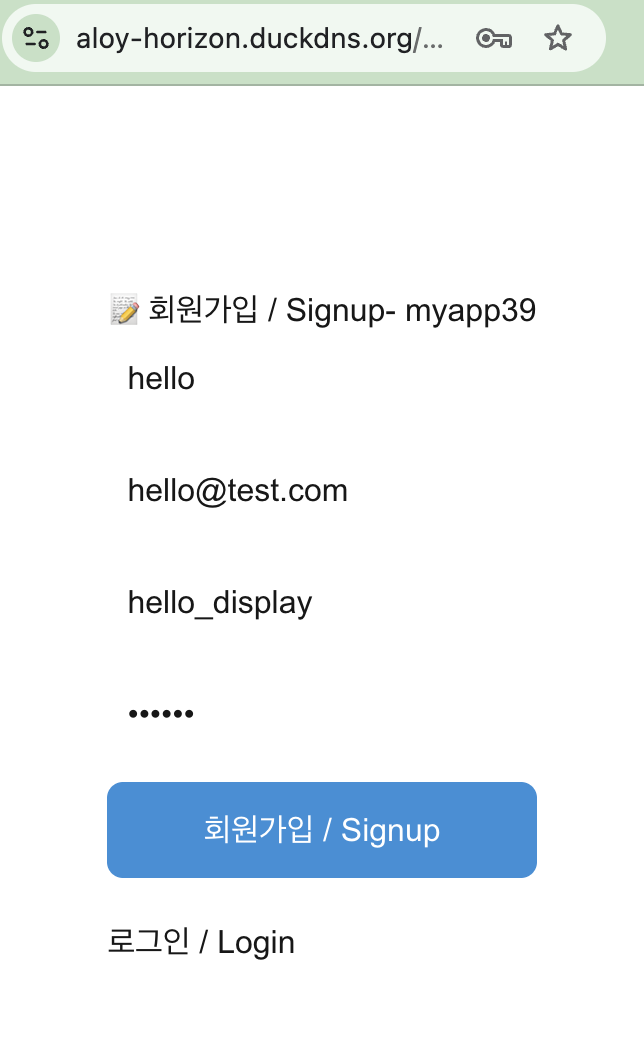
👉🏻 여기서는 회원가입 부분의 구조에 대해서 살펴봅니다.
Here, we examine the structure of the sign-up section.
👉🏻 nextjs업그레이드하려면 아래처럼 하시면 됩니다.
To upgrade Next.js, you can follow the steps below.
📁Nextjs 업그레이드 / Upgrade
✔️ 프로젝트에 다음과 같은 메세지가 보이면 업그레이드하면 됩니다.
If you see the following message in your project, you can perform an upgrade.
⚠ Installed Next.js version 16.4.0 is affected by a known security vulnerability.

Next.js security version upgrade available: 16.4.0 -> 16.4.2

  ❯ Upgrade now
    Skip
    Skip until next version
1)AI Agent가 자동업그레이드 하도록 허용하려면 아래와 같이 next.config.ts파일을 수정해야합니다.
To allow the AI Agent to perform automatic upgrades, you must modify the next.config.ts file as shown below.
import type { NextConfig } from "next";

const nextConfig: NextConfig = {

  /* Allow auto securiy upgrade for AI Agent */
   experimental: {
     agentUpgrade: "security"
   },

  /* allow domain*/
  allowedDevOrigins: ['aloy-horizon.duckdns.org', '*.duckdns.org'],

  /* host.domain.org/@userid */
  async rewrites() {
    return [
      {
        source: '/@:username',
        destination: '/usersui/:username',
      },
      {
        source: '/@:username/following',
        destination: '/usersui/:username?view=following', // ✅ myapp43 - initialView
      },
      {
        source: '/@:username/followers',
        destination: '/usersui/:username?view=followers',
      },
      { source: '/@:username/notifications', // ✅ myapp44 - initialView for notifications
        destination: '/usersui/:username?view=notifications'
      },
    ]
  },

};

export default nextConfig;
2)수동으로 업그레이드하려면 아래처럼 하면됩니다.
To perform a manual upgrade, follow the steps below.
npm install next@16.4.2📁 외부 앱 및 로컬 UI부분 인증 부분 구조
Authentication-related structure for external apps and the local UI
app/api/auth/
  ├── signup/route.ts      -> 웹사이트 회원가입 / website signup
  ├── login/route.ts       -> 웹사이트 로그인 / website login
  ├── logout/route.ts      -> 로그아웃 / logout
  ├── refresh/route.ts     -> refresh_token으로 access token재발급
  |                        -> Reissuing an access token using a refresh token
  └── me/route.ts          -> 로그인 체크 / Login check

app/auth/
  ├── signup/page.tsx      -> 회원가입 UI / Sign-up UI
  └── login/page.tsx       -> 로그인 UI / Login UI

oauth/authorize/route.ts   -> OAuth 동의 화면 / OAuth consent screen
oauth/token/route.ts       -> access_token 발급 / Issuance of an access token

lib/auth.ts                -> 실제 유저 검증 로직 (getUser, 세션 확인)
                           -> Actual user verification logic (getUser, session check)
📁 인증관련 데이터베이스 테이블
Authentication-related database tables
users              -> 회원가입, 유저 정보 (username, password hash, mastodon_id 등)
                      User registration, user information
                      (username, password hash, mastodon_id, etc.)

sessions           -> 웹사이트 로그인 세션 (refresh_token 쿠키)
                      Website login session (refresh_token cookie)

oauth_apps         -> 외부 앱 등록 (Pinafore, Tusky가 등록하면 client_id 발급)
                      Registering an external app
                      (a `client_id` is issued once an app like Pinafore or Tusky registers)

oauth_codes        -> OAuth authorize 코드 (임시)
                      OAuth authorization code (temporary)

oauth_tokens       -> access_token, refresh_token (외부 앱 로그인 완료 후)
                      access_token, refresh_token (after external app login is complete)
📁 회원가입 / join the membership
— 기본 동작 흐름은 아래와 같습니다.
The basic operational flow is as follows.
✔️ 데이터베이스 스키마 / Database Schema
CREATE TABLE users (
  username TEXT PRIMARY KEY,
  display_name TEXT DEFAULT '',
  summary TEXT DEFAULT '',
  private_key TEXT,
  public_key TEXT,
  email TEXT UNIQUE,
  password_hash TEXT,
  email_verified INTEGER DEFAULT 0,
  verification_token TEXT,
  created_at DATETIME DEFAULT CURRENT_TIMESTAMP
, mastodon_id TEXT);
✔️ 라우트 실행 / Execute route
https://aloy-horizon.duckdns.org/auth/signup✔️ 회원가입화면 / Sign-up Screen
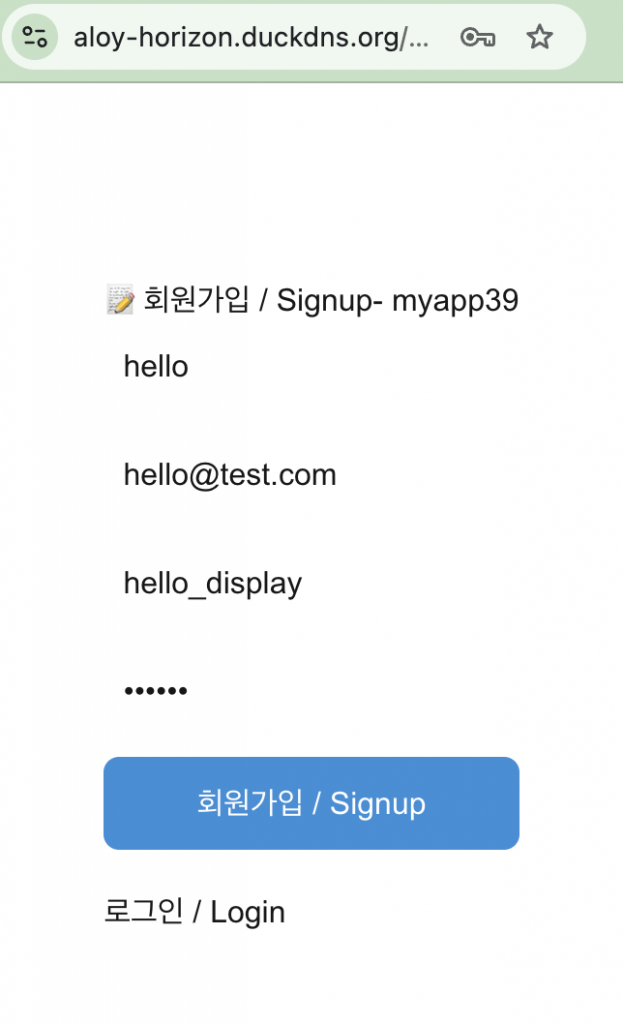
✔️ 데이터베이스 저장 확인 / Confirm Verify database storage
sqlite> select username,display_name,email from users where username='hello';
hello|hello_display|hello@test.com
sqlite>
✔️ 키 생성 확인 / Confirm Key Generation
... path... /hello % pwd
... path... /data/keys/hello
hello % ls
private.pem     public.pem
✔️ app/auth/signup/page.tsx – UI
 ... ...
 async function handleSignup(e: React.FormEvent) {
    e.preventDefault();
    setError('');

    const res = await fetch('/api/auth/signup', {
      method: 'POST',
      headers: { 'Content-Type': 'application/json' },
      body: JSON.stringify({ username, email, password, display_name: displayName })
    });

    const data = await res.json();
    if (!res.ok) {
      setError(data.error || '회원가입 실패/Join failed');
      return;
    }

    alert(`✅ 회원가입 성공/join membership success! ${data.username} 이제 로그인 / Already login`);
    router.push('/auth/login');
  }
... ...
return (
    <div style={{ maxWidth: 400, margin: '80px auto', padding: 20 }}>
      <h1>📝 회원가입 / Signup- myapp39</h1>
      <form onSubmit={handleSignup}
         style={{ display: 'flex', flexDirection: 'column', gap: 12 }}>
        <input placeholder="username (영문, 숫자, _)" value={username} onChange={e=>setUsername(e.target.value)} style={{ padding: 10, fontSize: 16 }} required />
... ...

        {error && <p style={{ color: 'red' }}>{error}</p>}
        <button type="submit" style={{ padding: 12, fontSize: 16, background: '#2b90d9', color: 'white', border: 0, borderRadius: 8 }}>
          회원가입 / Signup
        </button>
      </form>
      <p style={{ marginTop: 20 }}>
        <a href="/auth/login">로그인 / Login</a>
      </p>
    </div>
  );
... ...
A.폼 제출방지 – 이 코드가 있어야 페이지 이동 현상이 일어나지 않음
Preventing form submission – this code is required to ensure the page does not navigate away.
e.preventDefault();B.API 라우트로 폼 데이터 전송
Sending form data to an API route
 async function handleSignup(e: React.FormEvent) {
... ...
    const res = await fetch('/api/auth/signup', {
      method: 'POST',
      headers: { 'Content-Type': 'application/json' },
      body: JSON.stringify({ username, email, password, display_name: displayName })
    });
... ...
}
... ...
<form onSubmit={handleSignup} style={{ display: 'flex', flexDirection: 'column', gap: 12 }}>
... ...
 <button type="submit" style={{ padding: 12, fontSize: 16, background: '#2b90d9', color: 'white', border: 0, borderRadius: 8 }}>
          회원가입 / Signup
        </button>
... ...
</form>
C.API에러 발생시 UI에 에러표시
Display an error in the UI when an API error occurs.
... ...
   const data = await res.json();
    if (!res.ok) {
      setError(data.error || '회원가입 실패/Join failed');
      return;
    }
... ...
{error && <p style={{ color: 'red' }}>{error}</p>}
✔️ app/api/auth/signup/route.ts – API
— 데이터 체크 및 저장 / Data check and storage
... ...
export async function POST(req: Request) {
  try {
    const { username, email, password, display_name } = await req.json();

    if (!username || !email || !password) {
      // error : No required input values
      return NextResponse.json({ error: '필수 입력값 없음' }, { status: 400 });
    }

    if (username.length < 3 || !/^[a-zA-Z0-9_]+$/.test(username)) {
      // error : Usernames must be at least 3 characters long and consist only of English letters and numbers.
      return NextResponse.json({ error: 'username은 3자 이상 영문, 숫자만' }, { status: 400 });
    }

    if (password.length < 6) {
      // error : Password must be at least 6 characters long
      return NextResponse.json({ error: '비밀번호 6자 이상' }, { status: 400 });
    }

    // 중복 체크 / Duplicate check
    if (getUser(username)) {
      // error : Username already exists
      return NextResponse.json({ error: '이미 존재하는 username' }, { status: 409 });
    }
    if (getUserByEmail(email)) {
      // error : Email already exists!
      return NextResponse.json({ error: '이미 존재하는 email!' }, { status: 409 });
    }

    const passwordHash = await hashPassword(password);
    createUser(username, email, passwordHash, display_name || username);

    console.log(`✅ 회원가입/join the membership: ${username} / ${email}`);

    return NextResponse.json({ ok: true, username }, { status: 201 });
  } catch (e) {
    console.error('signup 에러 / signup error', e);
    return NextResponse.json({ error: '서버 에러 / server error' }, { status: 500 });
  }
}
1) 패스워드를 hashPassword함수로 암호화 합니다.
Encrypt the password using the hashPassword function.
const passwordHash = await hashPassword(password);2) UI에서 전달 받은 데이터를 데이터베이스에 저장하고 키 파일 생성
Save data received from the UI to the database and generate a key file
createUser(username, email, passwordHash, display_name || username);✔️ lib/auth.ts(hashPassword,createUser)
— hashPassword 함수의 다음과 같습니다.
The hashPassword function is as follows:
import bcrypt from 'bcrypt';
... ...
export async function hashPassword(password: string) {
  return await bcrypt.hash(password, 10);
}
1)hashPassword함수에 파라메터로 전달받은 내용을 bcrypt모듈로 암호화 합니다.
The content passed as a parameter to the hashPassword function is encrypted using the bcrypt module.
— createUser 함수의 구조는 다음과 같습니다.
The structure of the createUser function is as follows:
import db from './db';
... ...
export function createUser(username: string, email: string, passwordHash: string, displayName: string = '') {
  const { privateKey, publicKey } = crypto.generateKeyPairSync('rsa', {
    modulusLength: 2048,
    publicKeyEncoding: { type: 'spki', format: 'pem' },
    privateKeyEncoding: { type: 'pkcs8', format: 'pem' }
  });

  const userKeyDir = path.join(process.cwd(), `data/keys/${username}`);
  if (!fs.existsSync(userKeyDir)) fs.mkdirSync(userKeyDir, { recursive: true });

  fs.writeFileSync(path.join(userKeyDir, 'private.pem'), privateKey);
  fs.writeFileSync(path.join(userKeyDir, 'public.pem'), publicKey);
  console.log(`✅ 키 파일 저장/save key file: data/keys/${username}/`);

  // return db.prepare(`
  //   INSERT INTO users (username, display_name, summary, private_key, public_key, email, password_hash, email_verified, created_at)
  //   VALUES (?,?, '',?,?,?,?, 1, CURRENT_TIMESTAMP)
  // `).run(username, displayName || username, privateKey, publicKey, email, passwordHash);

  // ✅ myapp58 - mastodon_id 생성 / create mastodon_id
  const mastodonId = crypto.randomUUID().slice(0, 8);

  return db.prepare(`
    INSERT INTO users (username, display_name, summary, private_key, public_key, email, password_hash, email_verified, mastodon_id, created_at)
    VALUES (?,?, '',?,?,?,?, 1, ?, CURRENT_TIMESTAMP)
  `).run(username, displayName || username, privateKey, publicKey, email, passwordHash, mastodonId);

}
1)crypto모듈로 키파일 생성하는 부분입니다.
This part handles the generation of key files using the crypto module.
  const { privateKey, publicKey } = crypto.generateKeyPairSync('rsa', {
    modulusLength: 2048,
    publicKeyEncoding: { type: 'spki', format: 'pem' },
    privateKeyEncoding: { type: 'pkcs8', format: 'pem' }
  });

  const userKeyDir = path.join(process.cwd(), `data/keys/${username}`);
  if (!fs.existsSync(userKeyDir)) fs.mkdirSync(userKeyDir, { recursive: true });

  fs.writeFileSync(path.join(userKeyDir, 'private.pem'), privateKey);
  fs.writeFileSync(path.join(userKeyDir, 'public.pem'), publicKey);
A.키 2개 생성 / Generate 2 keys
1. 코드설명 / Code Explanation
modulusLength: 2048
- 키 길이. 2048비트. ActivityPub 표준. 길수록 안전, 느림.
Key length. 2048 bits. ActivityPub standard. Longer keys are more secure, but slower.

publicKeyEncoding: spki, pem
- 공개키 저장 형식 / Public Key Storage Format

privateKeyEncoding: pkcs8, pem
- 개인키 저장 형식 / Private Key Storage Format

2. 다음과 같은 형식으로 저장 / Save in the following format
privateKey = "-----BEGIN PRIVATE KEY-----\nMIIEvQIBADAN..."
publicKey = "-----BEGIN PUBLIC KEY-----\nMIIBIjAN..."
B.디렉토리 만들기 / Create a directory
const userKeyDir = path.join(process.cwd(), `data/keys/${username}`);
if (!fs.existsSync(userKeyDir)) fs.mkdirSync(userKeyDir, { recursive: true });

# ---- ----

1.코드설명 / Code Explanation
process.cwd() = 프로젝트 루트 / Project root (/Users/.../myapp61)
path = data/keys/bob(username)

경로에 디렉토리가 없으면 mkdir -p 로 디렉토리 생성
If the directory does not exist in the path, create it using `mkdir -p`.

2.디렉토리 생성 예시 / Example of directory creation
data/keys/
  ├── bob/
  ├── alice/
  └── charlie/
C.파일로 저장 / Save as a file
fs.writeFileSync(path.join(userKeyDir, 'private.pem'), privateKey);
fs.writeFileSync(path.join(userKeyDir, 'public.pem'), publicKey);

# ---- ----

1. 코드설명 / Code Explanation
userKeyDir(전체경로)아래 private.pem publick.pem파일을 생성함.
Generates `private.pem` and `public.pem` files under `userKeyDir` (full path).
D. 데이터베이스에도 키 저장 / Storing keys in the database as well
  return db.prepare(`
    INSERT INTO users (... ... private_key, public_key, ... ...)
    VALUES (?,?, '',?,?,?,?, 1, ?, CURRENT_TIMESTAMP)
  `).run(... ..., privateKey, publicKey, ... ...);
2)데이터베이스에 정보를 저장하는 부분입니다.
This is the part that stores information in the database.
  return db.prepare(`
    INSERT INTO users (username, display_name, summary, private_key, public_key, email, password_hash, email_verified, mastodon_id, created_at)
    VALUES (?,?, '',?,?,?,?, 1, ?, CURRENT_TIMESTAMP)
  `).run(username, displayName || username, privateKey, publicKey, email, passwordHash, mastodonId);
1)위의 키와 함께 전달받은 회원가입정보를 데이터 베이스에 저장합니다.
Store the user registration information received along with the key mentioned above in the database.
💡 lib/db.ts 파일설명은 생략합니다.
I will skip the explanation for the lib/db.ts file.
마태복음 21장 22절 / Matthew 21: 22
“너희가 기도할 때에 무엇이든지 믿고 구하는 것은 다 받으리라 하시니라”
“And everything you ask in prayer, believing, you will receive.”